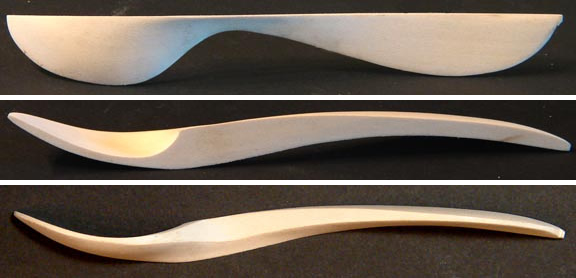
To help folk see the cross section of a spoon I carved one of basswood – then split it in two (above 3 pics) – so now you can see inside a spoon’s structure.
This page is for those who have our spoon carving package.
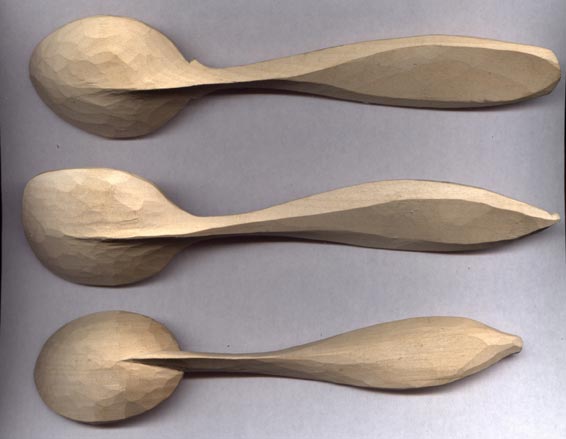
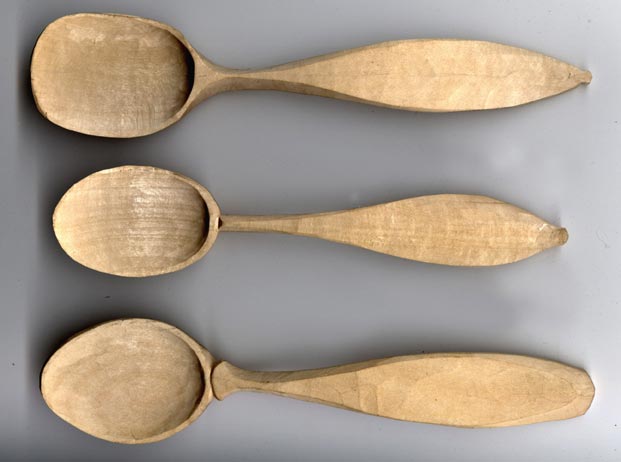
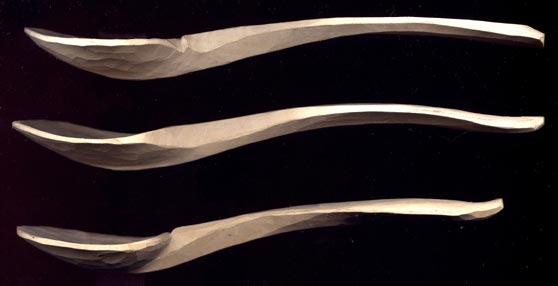
I scanned these pictures of spoons I have carved using the same blanks you have. The first pictures show 3 shape variations in the stage of a nearly completed spoon – ready for sanding.
You received both basswood and birch blanks, Carve the basswood first, it is the softest and easiest to carve, (but it cannot be used as a spoon, solely for decoration ) I included the basswood as a good learning tool.
Soaking birch spoon blanks: this can make a dry spoon-blank much easier to carve, somewhat approaching the ease of carving green wood.
Water absorbs much quicker through the end of the fibers, so soak a spoon for a day or two in a plastic bucket, shoe-box sized tubs work great (any iron will react with the wood).
Carve till you hit harder wood, then put it back into the bucket to soak more, the soaking will accelerate as you expose more end grain – going deeper down inside the bowl of the spoon. Or, a full week of soaking without carving should totally saturate the blank anyway. Longer than that is not useful, so get it roughed out and dried, or put in a plastic bag in your refrigerator or freezer.
When nearly done carving just set it in a shaded indoor spot to slowly lose its moisture. Do your finishing cuts when it is dry – that is easy to tell by its sound when rapped on another piece of wood. Do remember to thoroughly dry your knives after carving wet wood.
_____________________________________________________________________________
One technique to practice in the first roughing out stage of the spoon bowl is to carve cross grain ( the cutting edge exactly parallel to the fibers, see my video on the other tutorial page)
______________________________________________________________________________
Finishing eating and cooking spoons:
‘Lin olja’ is the Swedish name for oil of the flax plant, it is the preferred finish as it hardens in the wood…Spoons I made and finished this way when in Sweden in 1998 – still look great after thousands of uses!
In the USA ‘flax oil’ in hardware stores is called ‘linseed oil’ – but often has toxic hardeners in it.
So …’flax seed oil’ from the health food store is a safe way to get this oil, remember that this is the oil that oxidizes – so oily rags can combust if left in a pile.
However, the oxidizing / polymerizing in the wood is what makes it such a durable finish for utensils! Just put the spoon in a plastic bag and a couple times a day rub some oil around on it as it will absorb differently depending on the grain. After 3 days put it out to dry for at least a month, occasionally rubbing it.
Another good source for more serious spoon carvers is a wonderful company called Tried and True, they pre-polymerize flax seed oil that is great for utensils – thus it cures faster than raw flax seed oil.